Good Goods! I'm so sorry for the long gap of inactivity. I am very scatter brained and if I don't have a link in front of me or easilly accessible I forget about my pages. I'm so sorry.
I have been mostly keeping active on deviant art and Facebook lately.
I have a slew of stuff that's happened. Not just costuming but clay work and even art work. Yes I started trying to draw in January last year and I...actually seem ot be okay at it. Still a lot to learn.
Anyway, if you wish to see the current slew of activity I'll add all my other links here.
Deviantart: http://kurisuteru.deviantart.com/
facebook: https://www.facebook.com/kristelskreation
Twitter: https://twitter.com/oriadaya
Tumbler: http://omenswolf.tumblr.com/
The top two are my most active: Hopefully I'll be able to add store links in here in the future. Right now I'm still working on the fragility of my stuff. Its hard to ship fragile stuff.
Showing posts with label Crafting. Show all posts
Showing posts with label Crafting. Show all posts
Wednesday, December 28, 2016

Friday, September 25, 2015
Way too long...
I wasn't intending to be gone so long. Honest.
Life too a turn for the crazy.
I'm back now though as the dust settles.
And I didn't come empty handed. Unfortunately there isn't a construction aid this time, but I'll get around to one soon,
For now it's just updated images.
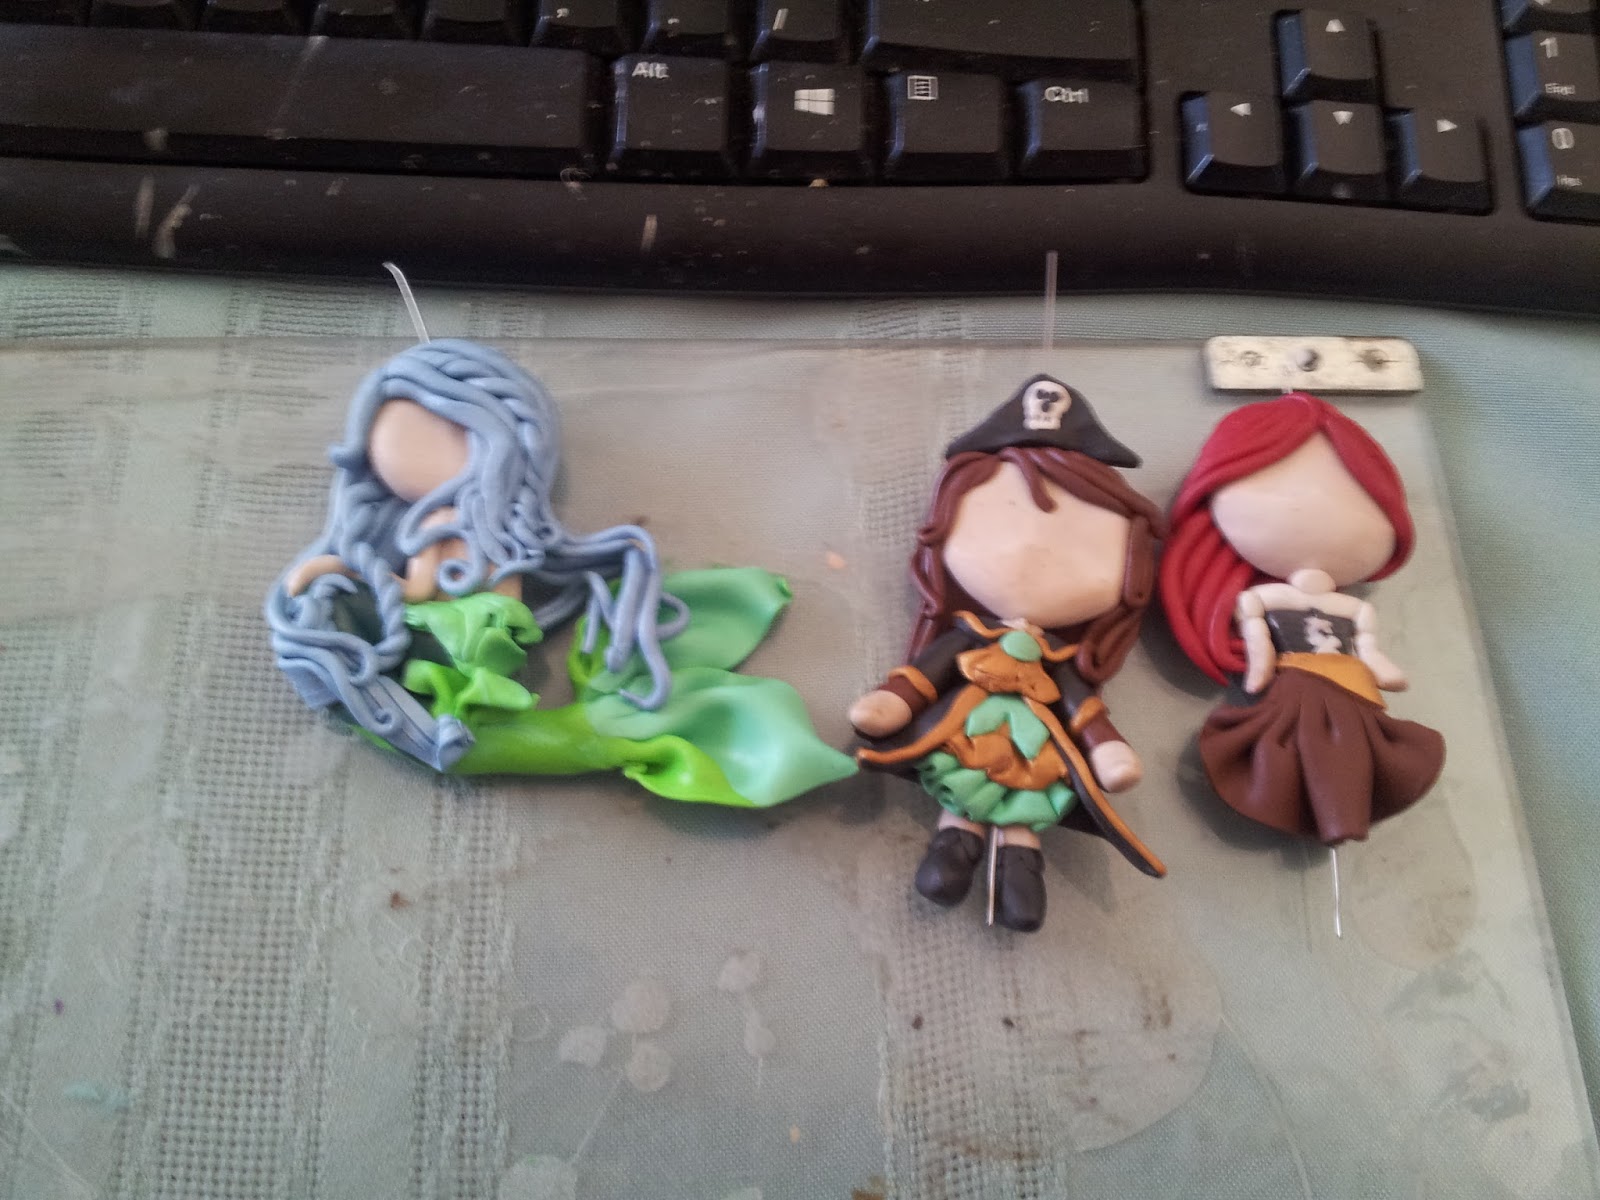
These charms will be sold at Emerald Valley Comic fest in eugene in two weeks.


Life too a turn for the crazy.
I'm back now though as the dust settles.
And I didn't come empty handed. Unfortunately there isn't a construction aid this time, but I'll get around to one soon,
For now it's just updated images.
These charms will be sold at Emerald Valley Comic fest in eugene in two weeks.


They all still need detail work, but so far I like them.
How about you?
Wednesday, July 15, 2015
SIlence and Current events
As many of you noticed, I've been silent for a while. I'm sorry. Life took a downward turn. It's not too bad, but it is taking time for us to fix things. This also leaves me withint internet a good portion of the time or too busy to sit down and do a post.
We're trying to move, but we're in transition and staying in a tiny trailer on the family farm. It's chaotic.
That being said, I have an event to distract me this weekend.
Seadogs in Lebanon Or.
I'll have a few new things this weekend.

We're trying to move, but we're in transition and staying in a tiny trailer on the family farm. It's chaotic.
That being said, I have an event to distract me this weekend.
Seadogs in Lebanon Or.
I'll have a few new things this weekend.
There will also be many dragons. I wish I could have made more ,but this is it for now.
Tuesday, June 2, 2015
Horns, cheap and simple
For Dystopia Rising, sometimes a list of requested donations goes out. On that list this time was a request for horn that were light and big. You can defintely buy these, but sometimes the directors put things on the list for people to make.
One of the marshals who runs the costume area made a comment I couldn't ignore even though I'm trying not to take on crazy amounts of work right now. :P
Anyway, I sat down and fiddled around a bit. I wanted to make these as simply and cheaply as possible. D.R. already costs a ton to play.
What you'll need:
Toilet rolls tubes or any type or rolled tubes
Tape
Scissors
Modge Podge
Paper Towels
I started but cutting down the rolls into strips or roll. Once I had enough I began building the horns. This is a lot like putting togeather a puzzel but you sometimes have to modify the pieces so they'll fit inside each tube. Use the tape to connect your card board strips into smaller circles as you make the point. Just keep fitting them into eachother at an angle and curling the horn till you get a shape you like. Something like this first picture.


One of the marshals who runs the costume area made a comment I couldn't ignore even though I'm trying not to take on crazy amounts of work right now. :P
Anyway, I sat down and fiddled around a bit. I wanted to make these as simply and cheaply as possible. D.R. already costs a ton to play.
What you'll need:
Toilet rolls tubes or any type or rolled tubes
Tape
Scissors
Modge Podge
Paper Towels
I started but cutting down the rolls into strips or roll. Once I had enough I began building the horns. This is a lot like putting togeather a puzzel but you sometimes have to modify the pieces so they'll fit inside each tube. Use the tape to connect your card board strips into smaller circles as you make the point. Just keep fitting them into eachother at an angle and curling the horn till you get a shape you like. Something like this first picture.

Once you're happy with the shape you can move onto the covering phase. You can't just jump right to painting as the card board will have huge gaps. By covering it with something like paper towel it'll fill in those gaps fairly well and give you a nice texture on the horns. I layed down a layer of modgepodge first. Then applied the torn up paper towels to the wet spot and covered that with more Modge Podge. I didn't repeat the whole layering here, but I'd recommend doing that just to make the horns stronger. Ttap the wet paper towel down into the rings a bit to accentuate the horn spirals a bit as you go. You'll have to let this dry over night before moving on to painting. Don't worry about the messy base yet. We'll get to that later. here they are with the modge podge all done.


Here's a pic of them after they've dried and had their first layer of paint. It's at this point you can get a bit fancy with the painting. Drybrushing, inking, etc. I just did a layer of brown for now. The right pic is them dry. YOu can see a bit of texturing and color splotching already.


This last part, connecting them to something, is always the hardest. I generally just use elastic. Just make sure you use a color that would disappear into your hair. This part is easy. Make a hole then add elastic. If you don't want them to move around much add knots on each side of the horn. Make sure you have them where you want them on your head.
Other ideas are to attach them to head bands. Or to use screws into wigs. etc.
As always have fun. if you have questions feel free to ask.
Friday, May 29, 2015
Another Dragon
Just a quickie post.
This guy just poped out of nowhere. I was mostly just playing with clay, trying to get rid of that brawn. No matter how much of it I use it just doesn't depreciate lol.
Overall he's cute, but I might do more painted detailing on him.


This guy just poped out of nowhere. I was mostly just playing with clay, trying to get rid of that brawn. No matter how much of it I use it just doesn't depreciate lol.
Overall he's cute, but I might do more painted detailing on him.


Wednesday, May 27, 2015
Current events
Things are quite hectic here as usual. We've been hunting for a home quite hevily and finally, hopefully found one.
*crosses fingers*
In the mean time. I've been trying to get refocused for Seadogs in July. To do that I've been making another series of dragons. Little pirate dragons.
The links to some tutorials on how I started are in this blog post: https://www.blogger.com/blogger.g?blogID=8755801839259003474#editor/target=post;postID=3842668546627630216;onPublishedMenu=allposts;onClosedMenu=allposts;postNum=39;src=postname


*crosses fingers*
In the mean time. I've been trying to get refocused for Seadogs in July. To do that I've been making another series of dragons. Little pirate dragons.
The links to some tutorials on how I started are in this blog post: https://www.blogger.com/blogger.g?blogID=8755801839259003474#editor/target=post;postID=3842668546627630216;onPublishedMenu=allposts;onClosedMenu=allposts;postNum=39;src=postname

And quite a few more momma dragons too.


Anf finally a new thing. Dragons in an egg.


Hopefully people will like them at Seadogs.
Wednesday, April 22, 2015
Dystopian Guns
Nerf Mods.
Everyone does them after some point of playing with those addicting little guns; either because a gun breaks down, or out of curiosity, or because a friend did it before and showed it off.
This week I'm only focusing on the painting of one, but you can go inside a nerf gun and mod the bejeebus out of their guts to make them fly faster, longer, hit harder, etc.
Painting a nerf gun is....well fairly simple.
Figure out a color theme. Do a base coat of black or white, or whatever you want your base color to be. Most of these are black. I have a plan for a white based one and a blue based one but that's i nthe future.
After that all it takes is fuguring out what colors will go where. I use P3 acrylic paints for painting small figures, but any acrylic works.
This key is a precise hand, and working slowly. Otherwise you get sloppy spots.
You will need:
A nerf gun. Find one from goodwill. Thats where I got most of my bases.
Paints-Acrylic, and a base coat. I just used the cheapest spray paint i could find.
Paint brushes, etc

 This was the second long rifle I painted. It comes in 4 parts. This is the middle secontion with the clip in.
 The long rifle is all togethere here. I Think I was still adding touches here and there as I put it together to get the colors to flow better.
 This was a bow I did a long time ago. One of the crappy rebel bows. I used a different type of paint, on that cracks and has texture because I wanted it to look old a rusty.
 This one is to show that you need to make sure you get your base coat in all the nooks and crannies. I missed the bullet slots a bit and the orange showed through.
 The roses and both of these were done by a friend who is an amazing artist.
 Another smaller bow that never really got used unfortunately. The little sigils said somethign but I don't recall now. lol.


Everyone does them after some point of playing with those addicting little guns; either because a gun breaks down, or out of curiosity, or because a friend did it before and showed it off.
This week I'm only focusing on the painting of one, but you can go inside a nerf gun and mod the bejeebus out of their guts to make them fly faster, longer, hit harder, etc.
Painting a nerf gun is....well fairly simple.
Figure out a color theme. Do a base coat of black or white, or whatever you want your base color to be. Most of these are black. I have a plan for a white based one and a blue based one but that's i nthe future.
After that all it takes is fuguring out what colors will go where. I use P3 acrylic paints for painting small figures, but any acrylic works.
This key is a precise hand, and working slowly. Otherwise you get sloppy spots.
You will need:
A nerf gun. Find one from goodwill. Thats where I got most of my bases.
Paints-Acrylic, and a base coat. I just used the cheapest spray paint i could find.
Paint brushes, etc
This was one of two I painted up for Dystopia Rising. (I kinda wish I had kept it. I really liked the design. Now I'm keeping an eye out for another of this type)
And finally the rifle I did for my husband. he played a strain called a Murican. As the name suggests they tend to be very...patriotic, annoying, lod, etc. Typical American really. They paint their stuff with the old red, white, and blue so his gun is a little...flamboyant
Overall, these can be very fun if you're just painting. Working on the inner guts can be very aggrivating if you're new to it. I lost a few guns when I firsted started.
Also to note!! All Nerf Guns Must have an Orange Tip as per the laws so that cops don't mistake them for real guns.
Feel free to always ask questions, comments, etc. I'm always up for a chat.
And never forget. If you don't try you won't find out if you can do something cool. Errors will happen. Don't fear them, just learn from them.
Saturday, April 4, 2015
Making Molds Round 1
Hello Everyone! I'm so sorry I've been absent for so long. I hope you weren't waiting too long. There are tons of great bloggers for crafts out there.
However, today I'm doing a post on making molds. There are many different ways to do this, but I'm doing silicone ones.
This is one of the myriad of videos I followed to make my putty with.
https://www.youtube.com/watch?v=aElFs2XsOHo
A quick search on youtube will bring up many more. It's fine to use one you're more comfortable with.
My ingredients/tools are:
Dap silicone100% silicone. It has to be 100% or things go wrong
Corn starch and a binder
oil. veggie oil is suggested, but i used penut oil. seemed to work the same
a tub to mix them in
and a mixing implement.
Things to make molds of
some sort of coloring agent if you don't want them to be white.
Now then. first a formost wear GLOVES! This crap is sticky. I probably did this round wrong, severly wrong. I also got the wrong color of silicone.
If you look closely my molds are cracking. I don't know where it went wrong but the drying process went really fast. That's not good when you wanna make a lot of molds.

Overall this is going to be a few parts post. At least untill I get this right. Not everything works out the first or even second time.
So keep an eye out as i try again.

However, today I'm doing a post on making molds. There are many different ways to do this, but I'm doing silicone ones.
This is one of the myriad of videos I followed to make my putty with.
https://www.youtube.com/watch?v=aElFs2XsOHo
A quick search on youtube will bring up many more. It's fine to use one you're more comfortable with.
My ingredients/tools are:
Dap silicone100% silicone. It has to be 100% or things go wrong
Corn starch and a binder
oil. veggie oil is suggested, but i used penut oil. seemed to work the same
a tub to mix them in
and a mixing implement.
Things to make molds of
some sort of coloring agent if you don't want them to be white.
Now then. first a formost wear GLOVES! This crap is sticky. I probably did this round wrong, severly wrong. I also got the wrong color of silicone.
If you look closely my molds are cracking. I don't know where it went wrong but the drying process went really fast. That's not good when you wanna make a lot of molds.
Overall this is going to be a few parts post. At least untill I get this right. Not everything works out the first or even second time.
So keep an eye out as i try again.
Comments, questions, advice are always welcome. :)
Friday, February 13, 2015
Absence and Horns
Sorry dear readers. It's been a rough start to the new year. My husband began a new job, a bunch of bills pilled up and have been taking their toll. The house is up for sale. I've been working small events that haven't brought in much. And the big event I was lookign forward to exploded. All of this didn't add u pto the doctor visit.
Yes, I went to a doctor.
The world blew up from there.
You see I haven't been to a medical facility in years. However my husband decided it was high time to do something cuz I was and am having a hard time focusing, had massive head aches, and terrible moodswings. And I"m not pregnant!
Thus something was off. I've always known something was off, but never worried about it. Long story short manic depressive with high spurts of manic.
Steps are taken.
In the mean time I said there would be horns.


Yes, I went to a doctor.
The world blew up from there.
You see I haven't been to a medical facility in years. However my husband decided it was high time to do something cuz I was and am having a hard time focusing, had massive head aches, and terrible moodswings. And I"m not pregnant!
Thus something was off. I've always known something was off, but never worried about it. Long story short manic depressive with high spurts of manic.
Steps are taken.
In the mean time I said there would be horns.
Doing these is very very simple. It's just a lot of twisting and playing around. It's a great beginner craft for clay.
Wednesday, January 28, 2015
New dragon style

Sunday, January 4, 2015
The Whole Point
For any crafter we do what we do becuase we love it. However, I've run into many crafters over the years who say things like:
"I wish I had that skill."
"I wanna be able to do that ,but i just can't get it right."
"I wish I was like you."
Really the list goes on, but it comes back to the I wish, I want, You're so talented, You do so much. ETC.
As I state in many of my posts. The first trick to getting here is the drive. You want to...no need to make that neat thing. No matter what. You just have to get the vision out.
The next is to JUST DO IT!
No seriouesly, even if the first ,second third, fifth type fails, just do it till its right. I make a ton of first tries untill I finally make a good one. Failure is a fact of life. It's how we learn.
For instance. Last night I made shepards pie for the first time. I don't cook well. I tend to burn things or over salt them, or just get it wrong. Last night was a first try and while I didn't burn it or over salt it because i knew of those problems I also noted it was kind of bland. So next time, and there will be a next time, I'll add a bit more seasoning. maybe not salt, but maybe a little spice between each layer. I'll also cook it just abit longer as it was a tiny bit mushy still.
You won't learn anything without trying. It's that simple.
The next point to doing anything is half part masochism, and half part stubbornness. It goes back to the need to make that visions right. Bare in mind there's no such thing as perfect. If there was compters wouldn't break down after 10 years.
Honestly I can go on about this. But there's a youtube vidoe that covers this better. It's from one of my favorite creators. He inspired me to just jump in with armor I was trying to make back in this post.: http://kristelskreations.blogspot.com/2014/01/dystopia-rising-armor-pt-1.html
Had I not stumbled upon one of his first vidoes aroudn the time I was figureing out armor and clothing, I would never have tried making mine. Either way he covers what I've been saying from the beginnign the best. https://www.youtube.com/watch?v=gPqe1aNdYuU
"I wish I had that skill."
"I wanna be able to do that ,but i just can't get it right."
"I wish I was like you."
Really the list goes on, but it comes back to the I wish, I want, You're so talented, You do so much. ETC.
As I state in many of my posts. The first trick to getting here is the drive. You want to...no need to make that neat thing. No matter what. You just have to get the vision out.
The next is to JUST DO IT!
No seriouesly, even if the first ,second third, fifth type fails, just do it till its right. I make a ton of first tries untill I finally make a good one. Failure is a fact of life. It's how we learn.
For instance. Last night I made shepards pie for the first time. I don't cook well. I tend to burn things or over salt them, or just get it wrong. Last night was a first try and while I didn't burn it or over salt it because i knew of those problems I also noted it was kind of bland. So next time, and there will be a next time, I'll add a bit more seasoning. maybe not salt, but maybe a little spice between each layer. I'll also cook it just abit longer as it was a tiny bit mushy still.
You won't learn anything without trying. It's that simple.
The next point to doing anything is half part masochism, and half part stubbornness. It goes back to the need to make that visions right. Bare in mind there's no such thing as perfect. If there was compters wouldn't break down after 10 years.
Honestly I can go on about this. But there's a youtube vidoe that covers this better. It's from one of my favorite creators. He inspired me to just jump in with armor I was trying to make back in this post.: http://kristelskreations.blogspot.com/2014/01/dystopia-rising-armor-pt-1.html
Had I not stumbled upon one of his first vidoes aroudn the time I was figureing out armor and clothing, I would never have tried making mine. Either way he covers what I've been saying from the beginnign the best. https://www.youtube.com/watch?v=gPqe1aNdYuU
Tuesday, December 9, 2014
Display boards
I've recently started going to craft fairs and cons i nthe local area. I'll be at Geek the Halls in Portland on the 14th if anyone is interested.
I discovered last event that my set up is not great. When you're sharing space with someone you need to be able to make a cohesive display. Something my partner and i are working on. The problem is she does a lot of big things or space munchers and I make a lot of little things thattend to fade out under the shade of things like her plushies and my scarves. I've been trying to make new displays but it just isn't working. My last one was too high up and before that my stuff just tended to blend together untill it looked like a rainbow had pooped on my table. It just wasn't working. Plus I needed a way to make pricing very obvious.
Into the back stock *clutter room* I went hunting for something. For the record I have a few display shelves I've picked up here and there. I have an earring rack that spins, a tall glasses spinner I just can't use yet, and other misc shelves. We use our black and qhite cubeing shelves to give us table height, but I still needed something that was low enough to not block the bottom cubes.
I found these:
 This is old cut pieces to an old light box that my cats killed, but I'm such a cheapskate that I couldn't toss good pieces. They're foam board. They're faily sturdy, They fit the size of the table space in front of my shelving, and I can build them up just high enough to give lift without blockign the cubes behind them. There was four but one was marked by the cat so I tossed it.


As always, with a little playing around I managed to fill in a need in my crafts. NEVER THROW USEFUL STUFF AWAY!
Edit: As much as these boards helped with transport, they eat up a ton of space. If you're working by yourself they're great because you can spread them out. However, if you are like me and sharing a table with friends then it doesn't work out so well. I've since added the necklaces and such to a hanging rack and reused these racks as a stepping shelf for my dragons.

If you have any questions, comments, critiques feel free to drop me a line. I'm always up for chatting.
I discovered last event that my set up is not great. When you're sharing space with someone you need to be able to make a cohesive display. Something my partner and i are working on. The problem is she does a lot of big things or space munchers and I make a lot of little things thattend to fade out under the shade of things like her plushies and my scarves. I've been trying to make new displays but it just isn't working. My last one was too high up and before that my stuff just tended to blend together untill it looked like a rainbow had pooped on my table. It just wasn't working. Plus I needed a way to make pricing very obvious.
Into the back stock *clutter room* I went hunting for something. For the record I have a few display shelves I've picked up here and there. I have an earring rack that spins, a tall glasses spinner I just can't use yet, and other misc shelves. We use our black and qhite cubeing shelves to give us table height, but I still needed something that was low enough to not block the bottom cubes.
I found these:
This was part of a roll of foam I tend to cut pieces from for boffer weapons...when I actually make boffers. I have a pretty big roll so I cut down three pieces for the boards.
My plan is to glue the foam to the boards, cover them with a fabric that matches my sign. (purple cuz I'm not doing more pink and the black in my stall is already overwhelming.)
To give it color I tacked some old fabric over the foam and board after glueing the foam to the board so nothing would slip. The fabric is microsuade which tends to be fairly dirt proof and water proof. Over time I'll have to change it but for now it works with my colors. I chose to pin it in case something does happen to the fabric. This way i can change it easier.
This is just an image of how i have the necklaces held onto the board.
Once I cover them I'll add a prop stand in the back. Not sure how yet though. My plan is to make these easy to collapse, pack and set up. So the prop stand needs to fold up or be somthing easily packed.
What I learned after building the boards was they were almost fine flat. They only needed minimal lift. Ineded up just making little blocks to put under them and now i have this.
The little pink flowers on the corners are the prices for the stuff on the board.
Update: I used the boards this last weekend. they were ok, ut really I think I need to make a spinning rack of some sort. These take up way too much table space.As always, with a little playing around I managed to fill in a need in my crafts. NEVER THROW USEFUL STUFF AWAY!
Edit: As much as these boards helped with transport, they eat up a ton of space. If you're working by yourself they're great because you can spread them out. However, if you are like me and sharing a table with friends then it doesn't work out so well. I've since added the necklaces and such to a hanging rack and reused these racks as a stepping shelf for my dragons.
For the record this worked out very well, but it needs reinforcing. It wobbles a bit. Also don't have anything above it. Someone will knock stuff down and you will lose product that way.
If you have any questions, comments, critiques feel free to drop me a line. I'm always up for chatting.
Tuesday, December 2, 2014
Anyone need plushies for christmas
A friend of mine over at http://octokittycrafts.blogspot.com/ is having a huge sale for her crochet plushies on facebook. https://www.facebook.com/octokittycreations
She's done some amazing stuff and I don't generally like crochet stuff, but I want all her mini plushies. it's insane!
Go take a look if you have a moment nad might be on the hunt for something fun.
She's done some amazing stuff and I don't generally like crochet stuff, but I want all her mini plushies. it's insane!
Go take a look if you have a moment nad might be on the hunt for something fun.
Tuesday, September 9, 2014
Missed update again
I'm really sorry for the lack of updates. It's just been really hectic again. I did two events back to back over the last two weeks. And it's been hard getting back on track. I'll hopefully have at least a small one this friday. Untill then have a dragon playing with their older sibling!

Wednesday, September 3, 2014
Missing Update
This last bit of the month was hectic. I went to Tortuga, a local pirate fest, as a merchant. It was a lot of fun, but also a lot of work and sadly I have anyother event coming up as well. Pacwar is this weekend and these events cut into my blog time. I'm hoping to be able to post something before I go but I'm not sure I'll be able too.
Therefore you get another dragon...playing dead.

Therefore you get another dragon...playing dead.
Tuesday, June 3, 2014
My Extended Absence
I apologize for being gone so long. A whole month more or less. You see, my plan when I started this was to do at least one post a week. I do still intend to meet that goal by the end of the year and to keep posting as much as possible but May was one hell of a roller coaster ride for me; physically, mentally, and emotionally.
In truth it began with a lot of Joy. I got married to a very wonderful man. I'll be calling him Squishy from now on. (Someday I"ll explain that pet name.) May 3rd was a lot of fun. That was what all that wedding crafting was for too. I had a lot of wonderful helpers and it was the most stress free I'd been in a long while.
After that my husband and I spent a week in Hawaii; a very generous gift from his grandmother. It was a blast. I might post some pics on here later. It was the first time I'd been in a plane, the first time out of the states, and the first time in a long time my allergies weren't going nuts. I loved every minute of it.
Then we came home and did a quick trip to Dystopia Rising. It was all going great with only a few minor bumps until all that good energy dropped away and I sprain my ankle just before the weekend started. I spent the whole weekend limping around and generally being miserable. I ended up begging my friends and staff to let us going home early. The reason for this oddity is that D.R. has a few rules. Two being that you must serve a shift as the bad guys and you must help with camp clean up. I was dead by the end of the weekend. Thankfully the staff was amazingly considerate and let us go. But the month wasn't done being unkind to me.
I got home and a few days later got a call that my grandfather had fallen, was in the ER, but was fine except for some pain in his hip. Literally the day after he left the hospital he feel into a sleep and passed away. This hit me really hard. I spent most of the day crying, but it's what comes after that so hard. I won't go into those details. I'm just giving you the reasons why such a young blog has stopped all of a sudden. I will post. I will keep this going. I just can't do it right now and for that I'm sorry.

In truth it began with a lot of Joy. I got married to a very wonderful man. I'll be calling him Squishy from now on. (Someday I"ll explain that pet name.) May 3rd was a lot of fun. That was what all that wedding crafting was for too. I had a lot of wonderful helpers and it was the most stress free I'd been in a long while.
After that my husband and I spent a week in Hawaii; a very generous gift from his grandmother. It was a blast. I might post some pics on here later. It was the first time I'd been in a plane, the first time out of the states, and the first time in a long time my allergies weren't going nuts. I loved every minute of it.
Then we came home and did a quick trip to Dystopia Rising. It was all going great with only a few minor bumps until all that good energy dropped away and I sprain my ankle just before the weekend started. I spent the whole weekend limping around and generally being miserable. I ended up begging my friends and staff to let us going home early. The reason for this oddity is that D.R. has a few rules. Two being that you must serve a shift as the bad guys and you must help with camp clean up. I was dead by the end of the weekend. Thankfully the staff was amazingly considerate and let us go. But the month wasn't done being unkind to me.
I got home and a few days later got a call that my grandfather had fallen, was in the ER, but was fine except for some pain in his hip. Literally the day after he left the hospital he feel into a sleep and passed away. This hit me really hard. I spent most of the day crying, but it's what comes after that so hard. I won't go into those details. I'm just giving you the reasons why such a young blog has stopped all of a sudden. I will post. I will keep this going. I just can't do it right now and for that I'm sorry.
You still get the hanging dragon that never was though. Apparently theres a type of clay that just doesn't liek to bake right.
Monday, April 21, 2014
Recent Absence
So, if I have viewers, then many of you will notice my weekly post hasn't come out in a while. It's because I'm getting married and we're down to the wire. I'm doing most of the wedding decor, planning, etc myself with the help of my fiance, family, and close friends. I haven't had much time for making things. I do have a few things to add, like the veil I made, the hair pins, and some little notebooks we made as favors, but I just don't have the time right now to post anything big. I'm so sorry. I promise that after May 12th I'll have new stuff for you.
Till then wish me luck. So far I've made it to the two week marker without going into bridezilla mode.

Till then wish me luck. So far I've made it to the two week marker without going into bridezilla mode.
Hair clips for my brides maids. I don't recall if these even got used?
Friday, February 14, 2014
Dragons!
I dabble in a lot of various crafts. You'll see a lot of different things from me over time on here. It all depends on my moods, my interests, what's needed from me, what's wanted, who's asking for something, etc.
At this moment I've had a request for mini dragons out of clay. Now if you do any sort of searching on etsy, deviant art, or any crafting site, various types of dragon statues will show up.
Some amazing creators are http://dragonsandbeasties.deviantart.com/, http://angeniac.deviantart.com/, and http://ninafimocreations.deviantart.com/ to name a few.
Furthermore, with a little patience, and some help from tutorials on deviantart you can make anything. For the dragons I'll be making I used this tutorial. http://www.deviantart.com/art/HTTYD-Toothless-Clay-Tutorial-238606963
In my attempt to have fun and learn to make a few of these for friends I may have...gone a bit over board! :)

 After the eyes I work on the horn designs. There are so many different ways to do these it's really up to your imagination. Dragons and Beasties linked above has tons of different ways she does horns, but I don't recomment copying styles. Lookign to learn is good but coming up with your own horns and spots can be fun too.
 After heads were done with horns and eyes the heads got put on the bodyies. Then I began exploring different styles of designs on the bodies.
 This one got little purple stripes and the bottom one got black stripes.


In this pic I show these little guys after firing. It doesn't change much in looks, but they are fairly solid now. I put them in at 275 degrees for about 30 minutes.
 This last pick is after they've been glazed and I let them sit overnight to dry. I think I might need to reglaze them or something. I'm not very sure one coat is enough? maybe it is.
Overall, there's many different styles that can be done and this is really easy, with a little patience, to build.
Feel free to ask questions, leave comments, etc. I"m always up for a chat!
At this moment I've had a request for mini dragons out of clay. Now if you do any sort of searching on etsy, deviant art, or any crafting site, various types of dragon statues will show up.
Some amazing creators are http://dragonsandbeasties.deviantart.com/, http://angeniac.deviantart.com/, and http://ninafimocreations.deviantart.com/ to name a few.
Furthermore, with a little patience, and some help from tutorials on deviantart you can make anything. For the dragons I'll be making I used this tutorial. http://www.deviantart.com/art/HTTYD-Toothless-Clay-Tutorial-238606963
In my attempt to have fun and learn to make a few of these for friends I may have...gone a bit over board! :)
Since I linked the tutorial above this will be less of a tutorial in it self and more of a I just had fun post. When I make these I generally work on the heads first. In this round I figured out different styles of eyes. While i was using dots before, here I used slits.
In this pic I show these little guys after firing. It doesn't change much in looks, but they are fairly solid now. I put them in at 275 degrees for about 30 minutes.
Overall, there's many different styles that can be done and this is really easy, with a little patience, to build.
Feel free to ask questions, leave comments, etc. I"m always up for a chat!
Subscribe to:
Posts (Atom)